Contents

Part 1: Exposure

  1. 1 Mastering the Exposure TriangleBalance aperture, shutter speed and ISO for brightness, depth, motion and noise.
  2. 2 ISO and image noiseWhen to raise ISO, why grain appears, and how to trade it for a faster shutter.
  3. 3 MeteringWhat the meter aims for, how to read it, the four metering modes, and Sunny 16 when there's no meter.
  4. 4 Shooting modes and the histogramLet the camera set one setting, steer it with exposure compensation, and check the result with the histogram and zebras.
  5. 5 Dynamic rangeHow many stops a camera can hold at once, what to keep when a scene is wider, and measured figures for real cameras.
  6. 6 Shutter speed and motionCamera shake, freezing or blurring a moving subject, and ND filters for long exposures.
  7. Part 1 cheat sheetFormulas and starting settings from chapters 1–6.
  8. Part 1 quizCheck yourself on chapters 1–6.

Part 2: Focus and depth

  1. 7 Camera LensLens anatomy and how to choose wide, standard, telephoto, prime, zoom and specialist lenses for real subjects.
  2. 8 Aperture and depth of fieldWhy a wider aperture blurs the background, what else controls blur, and the shape of bokeh.
  3. 9 Sensor size and crop factorWhat a smaller sensor crops, equivalent focal length and aperture, and why phones fake the blur.
  4. 10 Hyperfocal distanceSharp from here to infinity: focusing landscapes with blur circles, focus stacking and a cheat card.
  5. 11 Diffraction and the sharpest apertureWhy f/22 looks soft, where your lens is sharpest, and how pixel size changes it.
  6. Part 2 cheat sheetFormulas and starting settings from chapters 7–11.
  7. Part 2 quizCheck yourself on chapters 7–11.

Part 3: Composition

  1. 12 The composition reading planAll 15 chapters of The Elements of Composition, with printed page numbers and a photography lesson for each.
  2. 13 Introduction to compositionComposition as visual communication: choose what to show, compare three frames, and see how viewers read them.
  3. 14 What is composition?Arrange subject, space and edges to change what a photograph says; compare photos and make three versions of one scene.
  4. 15 Focal pointsChoose where the eye lands first, use contrast and space to build a visual path, then test thirds and diagonals in a field exercise.
  5. 16 LinesFollow straight, curved and implied lines through a photograph, then make three frames of one subject from different positions.
  6. 17 ShapesFind shapes made by subjects and space, use a frame within the frame, and compare three ways to place one subject.
  7. 18 TexturesMake a surface feel tangible with light, detail and context, then photograph one material three ways.
  8. 19 PatternsUse repetition to build rhythm, break a pattern to draw attention, and make three versions of one repeated scene.
  9. 20 SpaceUse positive and negative space, fill the frame, and simplify without losing meaning.
  10. 21 DepthLayer foreground, middle ground and background, and use perspective or deep space to show distance.
  11. 22 BalanceWeigh elements with symmetry, asymmetry and radial arrangements; explore the golden ratio as an optional guide.
  12. 23 ContrastCreate meaning and focus through contrasting subjects, light, shadows and colour.
  13. 24 ColorChoose hue, saturation and brightness, then compare complementary, triadic, analogous and monochromatic palettes.
  14. 25 ToneRead shadow, midtone and highlight; shape global and local tone while keeping meaningful detail.
  15. 26 AngleChange camera height and tilt to compare level, straight up or down, high and low viewpoints.
  16. 27 Composition conclusionBring the elements together in a four-frame story and develop your own way of seeing.

Part 4: Color Theory

  1. 28 Color Theory in PhotographyUse HSL, warm and cool depth, four color harmonies, white balance and selective editing to guide attention.
  2. 29 White balanceRead the color of light, match Kelvin and tint, and choose what to preserve when lights mix.

Tools

  1. Color wheelExplore hues, adjust saturation and luminosity, enter RGB or hex values, and preview the color live.
  2. Photo editorTry light, colour, detail and crop adjustments on a sample or your own photo, then save the result.
  3. Golden hour plannerSunrise, sunset, golden hour and blue hour for where you are, and where the sun rises and sets.
  4. ND filter calculatorYour shutter speed with an ND filter on, and a countdown timer for bulb mode.
  5. Depth of field calculatorHow much is sharp for your lens, aperture and focus distance, and the hyperfocal distance.
  6. Photo info and location removerSee a photo's camera settings and where it was taken, then remove the location before you share it.

Chapter 20Part 3: Composition

Space

How much room does your subject get? A small figure in an open frame, a busy scene with many points of interest, and a face that fills the photograph each use space differently.

What occupies the frame?

Positive space is where the picture asks for attention: a person, object, or several points of interest. Negative space is the area around them. It may be sky, a plain wall, shadow, or a quiet part of a scene. The two work together: changing the room around a subject changes how that subject feels.

01

One or many points

Positive space need not be a single object. Several people or distinct shapes can invite the eye to travel from one point to another.

02

Room around them

Open space can suggest scale, quiet or isolation. Where you place it matters: behind a person can feel different from space in front of their gaze.

03

Visual weight

A tiny dark person against a bright empty wall can still command attention. Count the strength of the elements, not merely their area.

Negative space does not have to be white or literally empty. It can contain low-detail scenery. Ask whether it supports your intended subject or competes with it.
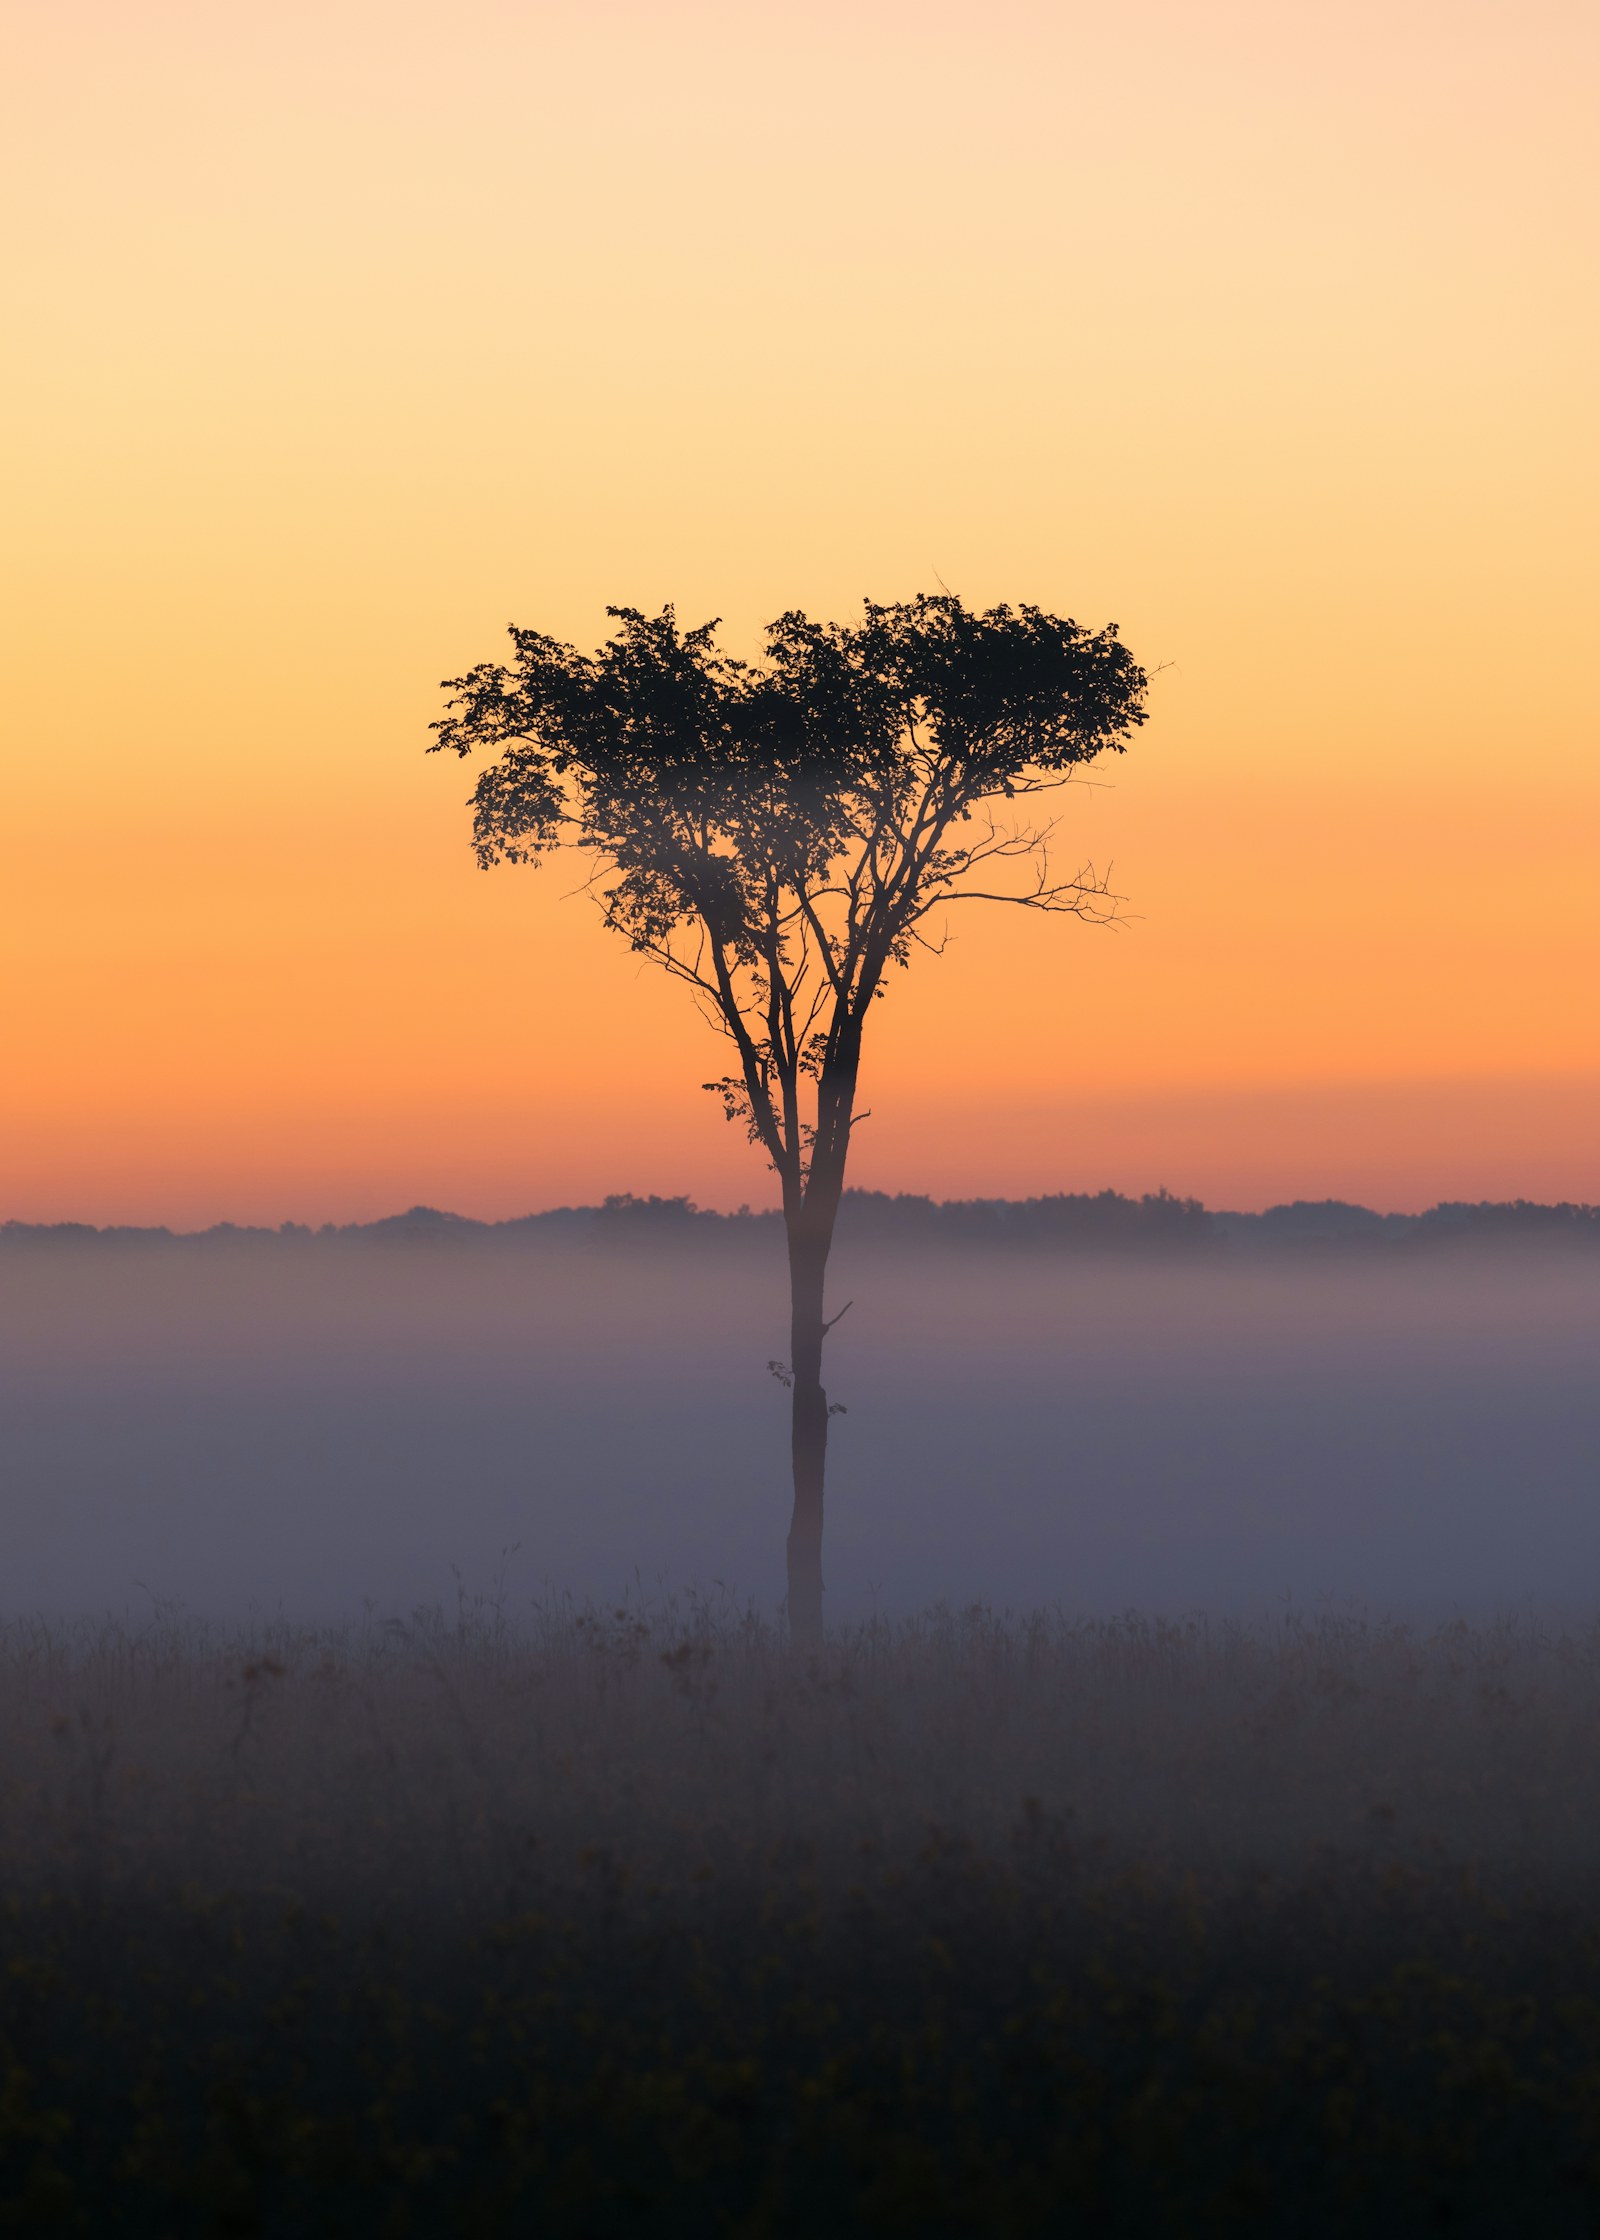

Two ways to allocate space

Small dark tree separated from its surroundings beneath a large open sky
Room around a subjectThe small tree has a clear silhouette. The open sky and mist make its isolation and the scale of the landscape legible.Photo by Dave Hoefler on Unsplash
Close portrait in warm sunlight with a face and hair filling most of the frame
Fill the frameThe face and hair take most of the space. There is little setting to explore, so expression becomes the main event.Photo by Cemrecan Yurtman on Unsplash

These are different subjects, so the comparison shows two uses of space rather than proving which is stronger. Photograph one subject both ways to test your own choice.

Fill the frame, then simplify

FILL

Move close to the subject

When the subject occupies most of the frame, attention becomes immediate. Move nearer, use a longer focal length, or crop later. Moving changes perspective and overlaps; cropping does not. Check that you have not cut off an important gesture or context.

SIMPLIFY

Keep only what earns its place

Simplicity can mean a face with almost no background, or one small person with a large quiet sky. The second still contains context, but it avoids competing details. A simple frame can carry a complex feeling.

CHOOSE

Match space to meaning

A wide frame may show scale or solitude; a close one may feel intimate. A busy scene can be deliberate when several subjects are the story. Decide what the viewer should explore before removing anything.

Field exercise: one subject, three allocations

Choose a stationary person or object you can photograph from several distances. Keep the light as consistent as possible.

  1. Give it room. Make the subject small and use a plain or quiet area around it. Decide which side needs more space.
  2. Fill the frame. Move closer until the subject dominates. Keep the detail that tells its story.
  3. Add a second point. Step back and include another meaningful element. Let the viewer's eye move between them.

Bring back: three photographs of the same subject. Under each, write what the surrounding area adds or removes, and which version says what you intended.

Review your frames

This original lesson develops Chapter 8, “Space,” of StudioBinder’s The Elements of Composition: The Complete Guide (printed pp. 37–47). See the composition reading plan.